In this article:
When you export your contacts from your database, it's possible that the file you got is not quite ready to be imported into the appliation. To make the data transfer easier, here are a few tips and tricks to help you :
Convert data separated by commas ( or semi colons) in Excel
If you exported your data from your contacts of a Gmail or Outlook account, it is possible that your information can be separated by commas or semi colons when you open it in Excel. It is also possible that a file opened from the invalid entries of your data importation will also be separated by these punctuations.

What to do?
First of all, don't panic! Simply follow these few steps to sort the data separated by punctuation into columns. It will then be easier for you to position your data in the right columns to prepare your file for its importation into the application.
If you are working from a CVS (.csv) file or Excel (.xls or .xlsx) follow these steps:
- Open your file in Excel.
- Select your "column A".
- In the "Data" menu, click "Convert" to open the dialog box.
- In the first step, in the "Type of data" section, select "Delimited" and click "Next".
- In the "Separator" section, choose the punctuation separating your data. You can easily determinewhich one it is by looking at the sign separating your data. If your data separator is not in the list, select "Other" and enter the appropriate sign in the empty box provided on the right. After selecting the right column delimiter, you will see in the data preview that your data is now separated into columns.
- You can click on "Done".
- Prepare your file for importation by placing your informations in the appropriate columns. It often happens that you will have useless rows to delete after a data exportation from an email software.
- Save your file in .csv and you will be ready to import your contacts into your account.
If you are working from a text file (.txt), follow these steps instead :
- Open a new Excel spreadsheet.
- Open the "Data" menu.
- In the section " External data" select " From text".
- In the box " Import text file" select your text file.
- Click on "import".
- In the first step, in the "Type of data" section, select "Delimited" and click "Next".
- In the "Separator" section, choose the punctuation separating your data. You can easily determine which one it is by looking at the sign separating your data. If your data separator is not in the list, select "Other" and enter the appropriate sign in the empty box provided on the right. After selecting the right column delimiter, you will see in the data preview that your data are now separated in columns.
- You can click on "Done".
- In the "Import data" box that will open, select which cell in your Excel spreadsheet you would like to import your file. Most often, it will be the cell A1. Your data will then appear separated in columns.
- Prepare your file for importation.
- Save your file in .csv and you will be ready to import your contacts to your account.
Transpose data in Excel
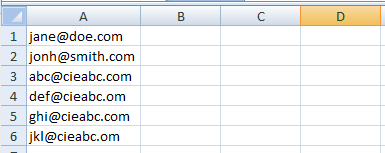
While importing your data from your data base or by copy/pasting them in Excel you obtained a file with all your adresses in the same cell and the same row,
![]()
![]()
What to do?
- Select the column where your data is.
- In the "data" menu, click on "Convert" to open the dialog box.
- In the first step, in the "Type of data" section, select "Delimited" and click "Next".
- In the "Separator" section, choose the punctuation separating your data. You can easily determine which one it is by looking at the sign separating your data. If your data separator is not in the list, select "Other" and enter the appropriate sign in the empty box provided on the right. After selecting the right column delimiter, you will see in the data preview that your data are now separated in columns.
- You can click on "Done".

- You will now need to transpose your adresses that are aligned on the same row into column A. To do so, copy the row where your email adresses are situated.
- In a new spreadsheet, select the first cell in column A.
- In the main meny, click on the pasting button to devellop the different pasting options and choose "Transpose".
- Then delete your first spreadsheet (the one with the data on the same row). You can now prepare your file for importation and save it in CSV.
Split names in Excel
If both the first and last name of your member are situated in the same column in your file, it would be best to split them into two separated columns to import these informations in the right section of your member details.

The simplest way is to use the space between the first and the last name to split them into separated columns. If both are separated by a comma, you can use the same steps but select the appropriate separator in the dialog box.
To convert the ful name of your member into two separate colums, follow these steps :
- Insert empty columns to the right of the column containing the name of your member as to not replace data when converting the column.
- Select the column containing the full name of your member.
- In the "data" menu, click on "Convert" to open the dialog box.
- In the first step, in the "Type of data" section, select "Delimited" and click "Next".
- In the "Separator" section, choose what is separating your data (space, comma). If your data separator is not in the list, select "Other" and enter the appropriate sign in the empty box provided on the right. After selecting the right column delimiter, you will see in the data preview that your data is now separated into columns.
- You can click on "Done".
- Make sure your information is placed in the right column for importation. It is possible you will have to move a few first names or last names to the right column.
Note : If some of your members have more than one first name or last name, it is possible you will have to correct them manually to ensure all the information is in the right column.

Standardize first names and last names of your members
If you wish to eventually use the placeholders for first and last names to personnalize your emails, it's important to pay attention to the way they are written in your member details since they will be added as is in your mailings.
If you have names written in uppercase and others in lowercase, it is possible to put them in a in a standard format so only the first letter will be in uppercase and the rest in lowercase. That way, when the information will be added to your email the result will be more aesthetically pleasing and uniform.
Here is how to use Excel to correct your information:
- Insert two empty columns to the right of your "First name" column in Excel.
- In the first empty column, enter the following formula : =FIRSTNAME(click on the cell you wish to transform) and press "Enter" on your keyboard.
- Copy the formula in each cell to the bottom of your data.
- Copy the column with the formula and paste it in the second empty column. In the pasting options, choose " Value only".
- Delete your starting column and the one with the formula. You only need to keep the last column where you pasted the data.
- Repeat steps 1 thru 5 to standardize the last names of your members.
Note: If you made changes to member details of members already in your cyberimpact account don't forget to choose the option alllowing you to update existing members during your importation for changes to be added to your account.
Use the "Search and Replace" function to correct information
If you wrote data in the wrong form for import ( for example if you wrote Madame instead of "f" for the gender of your member) you can use the function "search and replace" in Excel to correct lots of data at once.
To do so :
- Open your Excel file.
- Select the column in which you entered the data that needs to be changed.
- In the main tab, in the "editing" group on the right click on "search and select".
- Choose "replace" in the menu.
- In the box "Search and replace", enter the data to search and the data it needs to be replaced with.
- You can replace data one by one by clicking "Replace" or all at once by clicking "replace all".